Are you experiencing hip discomfort during your yoga practice? You’re not alone. Yoga can be a powerful tool for healing and strengthening. However, understanding its relationship with hip pain is crucial for a safe and effective practice. The connection between yoga and hip pain is complex. It is influenced by factors like individual anatomy, pose selection, and practice intensity. Whether you’re dealing with hip bursitis, tight hip flexors, or general discomfort, proper knowledge and modifications can make a difference.
In this comprehensive guide, we’ll explore evidence-based insights on yoga and hip pain. We draw from both medical research and experienced practitioners. You’ll discover:
- Safe poses and modifications for different hip conditions
- Common causes of yoga-related hip discomfort
- Expert tips for a pain-free practice
- Warning signs to watch for during your practice
Let’s dive into understanding how to nurture your hips while maintaining a fulfilling yoga practice.
Key Takeaways:
- Hip pain during yoga can stem from various factors. These include individual anatomy, improper alignment, and practice intensity. Working with a certified yoga therapist can help identify specific causes.
- Safe yoga poses and proper modifications are vital for managing hip conditions. Focus on gentle hip flexor stretches and avoid poses that cause discomfort.
- A holistic approach combining yoga therapy, physical therapy, and proper alignment techniques offers the best results for hip pain management.
- Early intervention and recognition of warning signs are crucial. If you experience persistent hip pain, consult healthcare providers before continuing your practice.
- Customizing your practice based on your unique hip structure and condition is key to preventing injury and promoting healing.
Understanding Hip Pain and Yoga
The relationship between yoga and hip pain is complex. It requires a deep understanding of both anatomy and movement principles. When practiced mindfully, yoga can be an excellent tool for managing hip discomfort. However, improper technique may exacerbate existing issues.
Common Causes of Hip Pain in Yoga
Hip pain during yoga practice often stems from several key factors. Pushing too far into poses without proper preparation can strain the hip joints and surrounding tissues. Many practitioners experience discomfort when attempting advanced poses before mastering the fundamentals. Group settings can sometimes create a competitive atmosphere, leading to overexertion and potential injury.
The hip joint’s complex structure involves multiple muscles, tendons, and ligaments. This makes it particularly susceptible to strain during certain yoga poses. Common conditions like hip bursitis, labral tears, and hip flexor strains can develop or worsen if poses aren’t modified appropriately.
The Role of Individual Anatomy
Everyone’s hip structure is unique. This significantly impacts how different yoga poses affect them. Some people naturally have deeper hip sockets, while others have more shallow ones. This anatomical variation means that what feels comfortable for one person might cause pain for another. Understanding your personal hip anatomy is crucial for safe practice. Factors like bone structure, muscle flexibility, and previous injuries all play important roles in determining which poses and modifications are most appropriate.
Working with qualified instructors who can assess individual needs and provide specific adjustments is essential. Regular practice should focus on building stability before pursuing increased flexibility. This approach helps protect the hip joint while gradually improving range of motion in a safe, sustainable way.
Key Takeaway:
Understanding your unique hip anatomy and practicing with proper alignment and modifications is essential. This helps prevent pain and injury while maximizing the therapeutic benefits of yoga.
Essential Hip Anatomy for Yoga Practitioners
The hip joint is one of the most complex structures in the human body. It plays a crucial role in our mobility and stability during yoga practice. Understanding its anatomy can help prevent injuries and enhance your practice.
Basic Hip Joint Structure
The hip is a ball-and-socket joint. The head of the femur (thighbone) fits into the acetabulum of the pelvis. This design allows for a wide range of motion in multiple directions, making it essential for yoga poses. The joint is surrounded by strong ligaments that provide stability while allowing controlled movement.
The hip joint is cushioned by articular cartilage. This cartilage covers both the ball and socket. This smooth surface enables fluid movement and helps distribute forces evenly across the joint. A ring of cartilage called the labrum deepens the socket and creates a seal around the joint, providing additional stability.
Key Muscles and Their Functions
Several muscle groups work together to control hip movement during yoga poses:
- Hip Flexors (Iliopsoas): Located at the front of the hip, these muscles lift the thigh toward the torso. This is crucial for poses like high knees and forward folds.
- Hip Extensors (Gluteus Maximus and Hamstrings): These posterior muscles move the leg backward. They are essential for poses like warrior poses and bridge pose.
- Hip Abductors (Gluteus Medius and Minimus): Located on the outer hip, they move the leg away from the midline. They stabilize the pelvis in standing poses.
- Hip Adductors: Inner thigh muscles that bring the legs together. They are important for poses like goddess pose and bound angle pose.
- External and Internal Rotators: Small deep muscles that control rotation of the thigh. They are vital for poses involving hip opening and twists.
Understanding these anatomical components helps practitioners recognize their body’s limitations and capabilities. This knowledge is particularly valuable when working with hip-opening poses or addressing hip discomfort during practice.
Key Takeaway:
The hip joint’s complex structure of bones, muscles, and connective tissues requires careful attention during yoga practice. Different muscle groups work together to enable various movements and maintain stability.
Safe Yoga Practice Guidelines
Listen to Your Body’s Signals
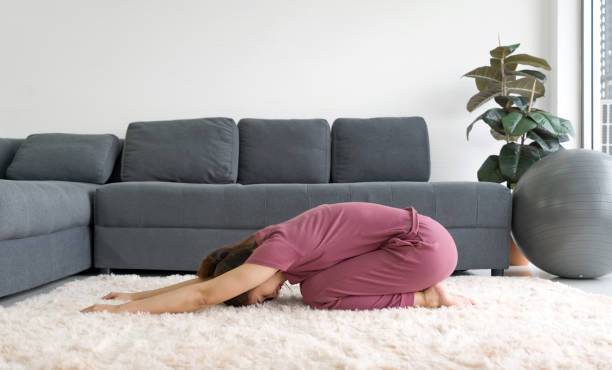
When practicing yoga with hip concerns, it’s crucial to develop a keen awareness of your body’s signals. Pain is different from discomfort. While mild stretching sensations are normal, sharp or intense pain is a clear warning sign to back off. Pay attention to how your body feels both during and after practice.
Take note of any lingering soreness or discomfort that persists more than 24 hours after your session. This could indicate that you’ve pushed too hard or need to modify certain poses. Remember, yoga should never cause lasting pain or aggravate existing conditions.
Modify and Progress Gradually
Start with gentler variations of poses and gradually work your way up to more challenging versions. Use props like blocks, straps, and blankets to support proper alignment and reduce strain on your hips. These tools aren’t just for beginners; they’re valuable aids for practitioners at all levels.
When working with hip pain, focus on:
- Maintaining proper alignment in each pose
- Using props for support when needed
- Taking breaks between challenging poses
- Avoiding poses that trigger sharp pain
- Building strength alongside flexibility
Work with experienced instructors who can provide personalized modifications based on your specific condition. Don’t hesitate to communicate your limitations and ask for alternatives when certain poses don’t feel right for your body.
Remember that progress in yoga isn’t measured by how deep you can go into a pose. It’s about how mindfully you practice and honor your body’s needs. Consistency with modified poses will yield better results than pushing too hard too fast.
Key Takeaway:
Practice yoga mindfully by listening to your body’s signals. Use appropriate modifications and progress gradually to ensure safe and effective hip pain management.
Major Types of Hip Stretches
Hip stretches can be broadly categorized into three main types. Each targets different muscle groups and addresses specific areas of tightness or discomfort. Understanding these distinctions helps create a more effective and balanced stretching routine.
Hip Flexor Stretches
Hip flexor stretches target the muscles at the front of your hips. These include the iliopsoas and rectus femoris. These muscles often become tight from prolonged sitting or repetitive activities. Low lunges and kneeling hip flexor stretches are particularly effective for this area. When performing these stretches, maintain proper alignment and avoid overarching your lower back.
Groin Stretches
The groin area, comprising the adductor muscle group, requires specific attention during stretching routines. Butterfly pose and wide-legged forward folds effectively target these muscles. Start with gentle movements and gradually increase the stretch intensity. Pay attention to any discomfort and avoid forcing the stretch beyond your natural range of motion.
Outer Hip Stretches
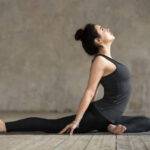
Outer hip stretches focus on the gluteal muscles and external rotators. These muscles can become tight from various activities and postural habits. Figure-four stretches and pigeon pose variations are excellent for targeting this area. When practicing these stretches, keep your pelvis level and avoid putting excessive pressure on your knees.
Remember to warm up properly before attempting any hip stretches. Start with gentle movements and gradually progress to deeper stretches. Listen to your body and modify the stretches according to your comfort level and flexibility.
Key Takeaway:
Hip stretches fall into three main categories: hip flexor, groin, and outer hip stretches. Each targets specific muscle groups and requires proper form and gradual progression for optimal benefits.
Modifications for Common Hip Conditions
Hip pain can significantly impact your yoga practice. However, with proper modifications, you can continue to enjoy the benefits of yoga safely. Understanding how to adapt poses for specific hip conditions is crucial for maintaining a sustainable practice.
Hip Bursitis Modifications
When dealing with hip bursitis, avoid poses that put direct pressure on the affected hip area. Instead of traditional pigeon pose, practice figure-four pose while lying on your back. This modification reduces stress on the bursa while still providing a gentle stretch. Use bolsters or blocks to support your body and maintain proper alignment during standing poses like Warrior I and II.
For seated poses, always sit on a cushion or folded blanket. This elevates your hips and reduces compression. During forward folds, keep a slight bend in your knees. Focus on lengthening through your spine rather than forcing the stretch. This approach helps prevent inflammation while maintaining mobility.
Hip Impingement and Labral Tears
If you’re experiencing hip impingement or labral tears, it’s essential to avoid deep hip flexion and extreme ranges of motion. Modify poses like low lunges by keeping the stance shorter and using props for support. Instead of bringing your knee close to your chest in poses like wind-relieving pose, maintain a more moderate range that doesn’t trigger discomfort.
During standing poses, work within a comfortable range. Avoid forcing your hips into extreme external rotation. Use the wall for balance and support when needed. For seated poses, maintain an elevated hip position. Focus on gentle movements that don’t compress the joint.
Remember to always listen to your body and work with a qualified instructor who understands your condition. Stop any pose that causes sharp pain or discomfort.
Key Takeaway:
Adapt yoga poses using props and modified alignments based on your specific hip condition. Focus on gentle movements within a pain-free range to maintain a safe and beneficial practice.
Professional Guidance and Support
Working with a Qualified Instructor
When dealing with hip pain during yoga practice, working with a qualified and experienced instructor is crucial. A knowledgeable teacher can provide personalized guidance. They ensure proper alignment and form in each pose. They can observe your practice, identify potential issues, and suggest appropriate modifications based on your specific condition.
Look for instructors who have additional training in anatomy, therapeutic yoga, or experience working with students who have hip conditions. These professionals can create a safe environment for your practice while helping you progress at a suitable pace.
Seeking Medical Advice
Before starting or continuing a yoga practice with hip pain, it’s essential to consult healthcare professionals. Physical therapists, orthopedic specialists, or sports medicine doctors can provide valuable insights into your condition. They help determine which yoga poses are safe for you.
These medical experts can:
- Assess your hip condition and identify underlying issues
- Provide specific recommendations for your yoga practice
- Help develop a treatment plan that incorporates yoga safely
- Monitor your progress and adjust recommendations as needed
Remember to maintain open communication between your healthcare provider and yoga instructor. This ensures your practice aligns with your treatment goals.
Key Takeaway:
Professional guidance from both qualified yoga instructors and healthcare providers is essential. This ensures safe practice with hip pain, proper alignment, and appropriate modifications for your condition.
Conclusion
As we conclude this exploration of yoga and hip pain, remember that your journey toward hip health is unique. It deserves a mindful, personalized approach. The key is to listen to your body, respect its limitations, and gradually build strength and flexibility through safe, modified practices.
Whether you’re dealing with hip bursitis, tight hip flexors, or general discomfort, implementing the evidence-based techniques and modifications we’ve discussed can help you maintain a sustainable yoga practice.
Remember to work with certified yoga therapists when needed. Don’t hesitate to seek physical therapy or orthopedic intervention if your hip pain persists. Your yoga practice should be a source of healing and empowerment, not discomfort.
By applying these holistic approaches and maintaining awareness of your body’s signals, you can develop good hip function while enjoying the numerous benefits of yoga. Start your journey today by incorporating these safe yoga techniques into your routine. Experience the transformative power of mindful movement.
FAQs
Can I practice yoga immediately after hip replacement surgery?
Wait at least 6-8 weeks post-surgery before starting yoga. Only begin with your doctor’s approval. Start with gentle movements and work with a certified yoga therapist who understands post-surgical modifications. Avoid deep hip flexion and extreme ranges of motion during initial recovery.
How often should I practice yoga to improve hip flexibility?
Practice hip-opening yoga poses 3-4 times per week for optimal results. Start with 15-20 minutes per session and gradually increase duration. Consistency is more important than intensity. Always listen to your body’s signals to avoid overstraining.
Is it normal to feel hip pain during certain yoga poses?
No, yoga should not cause pain. While mild discomfort during stretching is normal, sharp or persistent pain indicates you should modify or stop the pose. Work with a certified yoga therapist to ensure proper alignment and find suitable modifications for your body.
What’s the difference between hip pain from yoga and hip bursitis?
Hip pain from yoga typically subsides after practice. It is often due to improper alignment or overstraining. Hip bursitis causes persistent pain, especially when lying on the affected side, and may be accompanied by swelling. Consult a healthcare provider for proper diagnosis.
Can yoga help with hip arthritis?
Yes, gentle yoga can help manage hip arthritis symptoms. It improves flexibility, strengthens supporting muscles, and reduces stiffness. Focus on low-impact poses, avoid deep hip flexion, and practice with proper alignment. Always consult your healthcare provider before starting.
Should I use props during hip-opening yoga poses?
Yes, props like blocks, bolsters, and straps can make hip-opening poses more accessible and safer. They help maintain proper alignment, prevent overstraining, and provide support for tight hip muscles. Props are especially beneficial for beginners or those with limited flexibility.


![The Ultimate Guide to Increasing Flexibility: 10 Simple At-Home Exercises [With Videos]](https://bodyamigo.com/wp-content/uploads/2025/01/pexels-photo-3757955-440x293.webp)
![The Ultimate Guide to Increasing Flexibility: 10 Simple At-Home Exercises [With Videos]](https://bodyamigo.com/wp-content/uploads/2025/01/pexels-photo-3757955-320x213.webp)

Leave a Comment